You've waited days for your epoxy to cure. You've carefully demolded it. Now you're staring at a rough casting with swirl marks, uneven surfaces, and maybe a few imperfections you didn't expect.
This is where most people get stuck. YouTube videos show the glamorous pour, but they skip the unglamorous truth: processing your epoxy casting takes longer than making it. And if you rush this stage or use the wrong techniques, you'll ruin days of work.
I've spent hours fixing pieces I thought were beyond saving, and I've learned that proper epoxy processing isn't just about making things look good - it's about understanding how resin behaves under heat, pressure, and abrasion. Get these fundamentals right, and you'll transform rough castings into pieces that look professionally made.
Let's walk through the complete processing workflow - from rough flattening to that final glass-clear finish.

In Epoxy Casting for Beginners: Complete Preparation Guide, we covered everything from preparation through mixing and casting. Now your mold has cured for the proper time and you've released it from the form. What comes next determines whether your piece looks homemade or professional.

Table of Contents
1. Initial Surface Flattening After Demolding
Once your epoxy casting is demolded, the first step is flattening both surfaces. Even if you used a level workbench, there's always some unevenness, mold texture transfer, or slight warping. This isn't optional - skip it and you'll fight alignment issues through every subsequent step.
The flattening method depends entirely on your project size and available tools.
Small Epoxy Projects (Inlays, Crack Fills, Small Pieces)
When you're working with epoxy inlays or crack filling where the base wood stayed relatively flat and epoxy volume is minimal, you need tools that remove excess hardened resin without destroying the surrounding wood.

Belt Sander or Orbital Sander
Start with coarse grit (60-80 grit) and work systematically. Here's what I wish someone had told me earlier:
Heat management is critical.
Friction generates heat fast. Move constantly. Focus on one small area too long and you'll see the epoxy change color, get tacky, or develop surface cracks. I ruined a walnut inlay piece this way - beautiful clear epoxy turned cloudy yellow in spots from overheating.Use sandpaper designed for epoxy resin.
Standard wood sandpaper clogs immediately with resin. Epoxy-specific or automotive sandpaper (which handles paint well) lasts 5-10 times longer. This isn't marketing hype - with cheap materials, work takes forever and quality suffers.Ventilation and dust protection matter.
Even with dust extraction running, I wear a respirator mask. Epoxy dust is nasty stuff you don't want in your lungs. If you can smell it, you're breathing it.
Hand Planer or Stationary Planer/Jointer
This can be combined with sanding. The advantage is no local overheating - you're slicing off material, not grinding it. The disadvantage is epoxy chipping if your blades aren't sharp. Replace or sharpen blades more frequently when working with epoxy than you would for wood alone.
Larger Epoxy Castings (Serving Trays, River Tables, Large Surfaces)
Projects with substantial epoxy surfaces need different approaches. You're removing more material and working with larger surface areas that must end up perfectly flat.
Router Flattening Jig (Most Common for Home Shops)
This is what most hobby craftsmen use, and it's what I use for pieces up to 120cm x 80cm.
The setup: A horizontal bed with two straight, perfectly level rails on the sides. A trolley holding a router with a large surfacing bit rides over these rails, taking consistent passes across your workpiece.
You can build your own jig from aluminum extrusion profiles (like I did), or buy commercial versions. The key is rigidity and perfect levelness.

What to expect:
The surfacing bit leaves circular swirl marks. These come out during sanding, but they look rough initially.
Multiple passes are needed. I typically take 1-2mm depth per pass maximum.
Dust extraction is essential. The volume of epoxy and wood dust is massive.
Bit quality matters enormously. Cheap bits dull fast, burn the epoxy, or tear fibers instead of cutting them.
CNC Router (Professional Option)
If you have access to a CNC or can pay for the service, this delivers near-perfect flatness. You don't need to own one yourself - just search for woodworking companies in your area and give them a call. Most are willing to provide this service for reasonable cost.
When I have a client piece or something that absolutely must be perfect, I use a local shop's CNC. The surface quality is worth every penny.
2. Cutting Epoxy to Final Dimensions
At this stage, you have a perfectly flat slab - scratched from sanding or marked from routing, but geometrically flat. Now it's time to cut to final dimensions.

Cutting can is usually done by:
Table saw or track saw
or CNC for more complex shapes
Use cutting blades with a higher tooth count to prevent edge chipping.
If you plan on having beveled or rounded edges on your project, now is the best time. Edges are mostly formed by hand routers. When the surface is finely sanded, routing is going to definitely cause additional new scratches, and the whole fine-grinding procedure has to be repeated.
To have fine, clean edges, use sharp, high-quality routing bits. To me, it also helped increase the router’s rpm. You acquired some scrap pieces a moment ago from the cut-to-size step. Try out edge routing on them first to ensure you have everything set right.
3. Sanding
Honestly, this is my least favorite process step. However, it will become almost acceptable with proper tooling, setup, and skills. Tools used for grinding of the roughly flattened project are:
Orbital sander
Of course, you can decide to sand the whole project manually. However, in this case, time-saving and quality enhancement using the correct power tool is huge. I consider an orbital sander a must.
Sander disk diameter is typically 125mm or 150mm. You will acknowledge the benefits of a bigger one, especially on larger surfaces.
On the market are also products with driven sanding disc mode (or turbo mode). This improves tool efficiency in the early stages (lower grits). For fine high gloss epoxy sanding it shall not be used.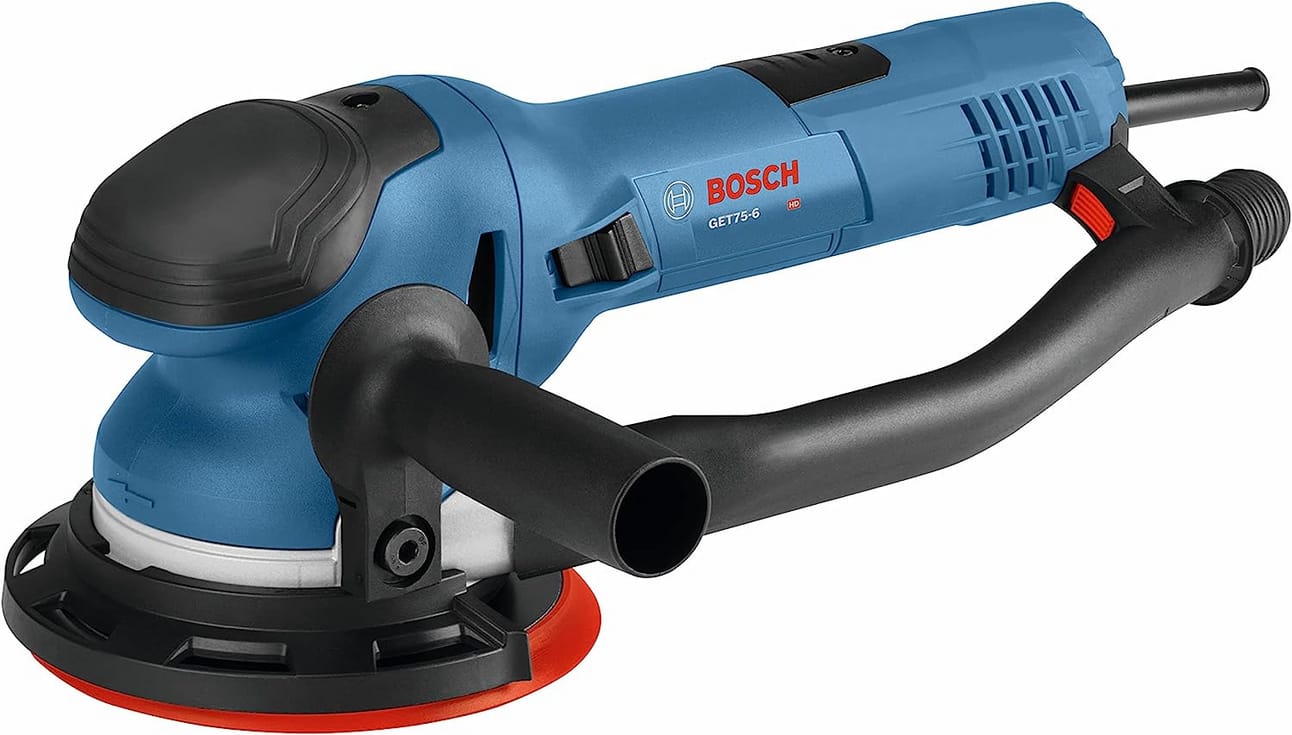
Sandpaper Set Designed for Epoxy
There are sandpaper manufacturers with products optimized for epoxy resin. I strongly suggest investing more in these products. With cheap papers, the work is extremely difficult and time-consuming. Trust me, I learned this the hard way at the beginning.These manufacturers provide recommended grit sequences for best results. From my experience, improvising is not the best idea - follow their guidance

Polishing Machine & Paste (For High-Gloss Finish)
In case you intend to go for a high-gloss finish, a polisher is needed, including appropriate pads and paste. More on this later.
Dust Extraction System
Health and safety rules for working in dusty environments should be followed twice as fiercely when sanding epoxy resin - especially when sanding to very fine grits. Ensure your workplace is well-ventilated and the dust extraction system works properly. Personally, even with dust exhaust, I still wear a protective face mask.


Matt or Glossy: Choose Your Finish Level
What's your goal? Matt or glossy epoxy surface?
I find staying with a matt surface much more practical, which means finishing sanding at 320-400 grit. A mirror-like glossy surface requires sanding up to 3000 grit and finishing with polishing paste.

With glossy surfaces, consider these drawbacks (that nobody tends to mention):
All dust particles and fingerprints are visible. Touch your glossy river table once and you'll see it.
All impurities and micro-bubbles inside transparent epoxy become noticeable. What looked fine at 320 grit becomes obvious at 2000 grit.
Epoxy hardness is nowhere near glass. Over time, your project will accumulate scratches, which show more prominently on glossy surfaces.
More time, equipment, and skill demanding. You have to work through additional sandpaper grit levels, finishing with a polisher. If you miss a scratch from previous levels, you have to go back by one or more grit levels and work it up again.
For some projects, glossy finish looks incredible and can be achieved. Effects like 3D casting actually wouldn't shine without a glossy surface. Just for a heavily used dining table, it doesn't make much sense to me.
The Progressive Grit Sequence
Start where your previous step left off. If you used a router sled with a surfacing bit, you probably have deep swirl marks - start at 80 grit.
Standard progression for epoxy processing:
For Matt Finish (320-400 grit final): 80 → 120 → 180 → 240 → 320 → (optional 400)
For Satin/Semi-Gloss Finish (600-800 grit final): 80 → 120 → 180 → 240 → 320 → 400 → 600 → (optional 800)
For High-Gloss Finish (wet sanding to 3000 grit): 80 → 120 → 180 → 240 → 320 → 400 → 600 → 800 → 1000 → 1500 → 2000 → 3000 → polish
The Sanding Process (Straightforward and Boring)
1. Prepare and organize your sandpapers
Order them by grit. Keep your sandpapers in a clean spot. Think about where you put your sander down. Any workshop dirt, especially on fine grits, will cause unplanned scratches resulting in additional work.
2. Set up dust extraction system
Run it continuously. Epoxy dust buildup on your sandpaper creates heat and stops cutting.
3. Start with the lowest grit (usually 80-100)
Slowly sand the whole surface in vertical and then horizontal directions. Make sure the sander disk you hold is totally flat. Remove all the scratches and swirls from the previous processing step.
Keep sanding papers clean without dust build-ups. If you notice swirl patterns on the surface, stop and clean the sandpaper and surface of dust.
4. Carefully vacuum and dust off
Clean between every grit change. This prevents contamination.
5. Continue with the next grit
Do not skip the grit sequence! Each grit removes the scratches from the previous grit. Skip one and those deeper scratches remain, just less visible - until finish goes on and highlights them.
6. Repeat until you reach your intended maximum sanding level
Check your progress constantly. Wipe the surface clean and inspect under good lighting. Scratches from the previous grit must be completely gone before moving to the finer grit.
Polishing for High-Gloss Finish
Polishing takes place as the final step when you aim for a glossy finish.
Clean the surface very carefully with a microfiber towel. Any particles left might cause additional scratches during polishing.
Set your polisher to low RPM. I use a one-step nano polishing paste with good results. Take your time; don't hurry. Work in small sections and maintain consistent pressure.
The Most Common Sanding Mistake
Skipping grits to save time.
If you jump from 120 to 320 grit, you'll think you're done - until you apply finish and see every 120-grit scratch highlighted under the clear coat. There's no shortcut here.
I've had to strip and re-sand pieces because I got impatient. It's infuriating. Don't be me.
4. Repair Methods
The impurities inside hardened epoxy volume are nearly impossible to correct. That's multiplied by transparent resin casts, where you see through the whole epoxy thickness. However, for surface flaws on wood or epoxy colored by inks or powders, there are several options:
Color-Matched Epoxy Fill
Mix a small volume of epoxy (preferably the faster-hardening variant) and tone it the same as the base resin cast. It has better color matching, but it takes at least 12-24 hours to cure.
Apply with a toothpick or fine applicator for small voids. Overfill slightly - it will shrink as it cures. Let cure fully, then sand flush during your next grit progression.
CA Glue (Super Glue) for Small Flaws
CA glue is used in combination with an activator for small flaws like bubbles. Mix a few drops aside and tone them if needed. On a needle tip, let it drop into the bubble void. Apply the activator afterward for instant hardening.
This method is much faster than waiting for epoxy to cure. Just keep in mind that CA glue itself has higher hardness and a slightly different light refraction index than epoxy - it might be visible in very clear castings.

Clear Transparent Mixture
In some cases, repairs even of colored resin casts can be done with clear transparent epoxy mixture, also with very good results. This works when the flaw is small enough that the color difference isn't noticeable.
Repair Strategy by Flaw Type
Small Voids and Pinholes: CA glue or thin epoxy fill
Larger Voids or Chips: Color-matched epoxy, overfill, cure, sand flush
Hairline Cracks: Flood with thin CA glue or thin epoxy mix
Wood Cracks Found After Flattening: Color-matched epoxy or dark/black epoxy for contrast effect
5. Achieving Professional Epoxy Surface Finish
The final surface treatment magnifies the impression of your project - or ruins it. Most makers want to increase the contrast between epoxy and wood grain while providing protection and enhancing appearance.
You've sanded through the grits. Surface is smooth. Now comes the decision that determines what your piece looks like for its entire life: final finish.

Hard Wax Oils (Most Common)
The most common finish uses a variety of hard wax oils. The epoxy pattern, as well as grain structure, pops up beautifully, and the surface is very pleasant to touch.
Application Process:
The application is simple, fast, and typically done in one or two layers.
Follow the instructions on your chosen product carefully
Stay patient even if it might be difficult, and respect hardening times
Buffing with Scotch-Brite (fine/very fine) in combination with a low-speed orbital sander saves time and increases quality, from my experience
Advantages:
Easy and fast application
Beautiful natural appearance
Pleasant tactile feel
Friendly to potential future small surface repairs
Enhances wood grain and epoxy contrast beautifully
Considerations:
Somewhat limited surface protection compared to polyurethane coatings
Some manufacturers restrict wood sanding roughness for optimal oil soaking into grains (e.g., 220-320 grit), which might conflict with high-gloss epoxy sanding. Make a test on scrap piece if you plan to ignore suggested surface roughness.
Most Popular Brands:
Rubio Monocoat - Pretty expensive, but can be applied in one layer. Pre-coloring or aging complementary products extend your options even further. In my experience, it's also the easiest and fastest application. This is what I use for most client pieces.

OSMO - Another high-quality finish. At least two coatings are suggested. The color palette is quite limited to base tones, but it's more affordable than Rubio and delivers excellent results.

Flood Epoxy Coating (High-Gloss, Self-Leveling)
For some cases, you might want to try flood coating, which means applying a final epoxy layer on top of your project without any additional sanding afterward.
Process:
Base roughness should be about 220 grit
Carefully clean the sanded surfaces - any dust shows up
Pour a thin epoxy layer
Let it spread evenly and allow the resin excess to drop off over vertical edges
Use heat gun or torch to remove bubbles
Cover while curing to prevent dust
After it hardens, just sand the bottom side
My honest take:
I don't prefer this option, as I've never been able to achieve perfectly flat surfaces with flood coating. Self-leveling works in theory, but in practice, I always get slight unevenness or edge buildup that bothers me. Some people swear by it though.
Pros:
Maximum depth and glass-like clarity
Self-levels (in theory)
Very durable surface
Creates that "wet look" many people want
Cons:
Adds cure time (another 24-72 hours)
Uses additional epoxy (cost)
Susceptible to UV yellowing over time without UV-resistant formula
Difficult to achieve perfectly flat results
Shows every dust particle if you're not careful
Polyurethane Coatings (Protective, Professional)
Best applied with a paint gun. Multiple layers and sanding between coats are needed. Provides very good surface protection. Perfect if your aim is a glossy surface of the whole project.
Process:
Sand to 320-400 grit
Apply thin coats with spray gun (or foam brush for small projects)
Light sand with 600 grit between coats
2-3 coats minimum for build
Water-based poly gives UV protection without yellowing. Oil-based gives warmer tone but yellows slightly over time.
Pros:
Excellent surface protection
UV protection available
Various sheen levels (matte, satin, gloss)
Very durable for high-use surfaces
Cons:
More time-consuming than oil finishes
Requires spray equipment for best results
Shows brush marks if hand-applied poorly
Less natural appearance than oil finishes
Oil Finish (Natural, Low-Sheen)
Penetrating oils like Danish oil create a natural look that enhances the wood while leaving epoxy smooth.
Process:
Sand to 400-600 grit
Apply oil liberally
Let penetrate 10-15 minutes
Wipe excess completely
Buff after drying
Multiple coats as needed
Pros:
Easy to apply and repair
Very natural appearance
Highlights wood grain beautifully
No specialized equipment needed
Cons:
Less protection than film finishes like polyurethane
Requires more maintenance over time
Not fully waterproof
Not ideal for high-use surfaces
My Recommendation by Project Type
Functional pieces (cutting boards, coasters, serving trays): Hard wax oil or polyurethane - durability matters
Furniture (tables, shelves, desks): Hard wax oil for natural look, polyurethane for high-traffic areas
Decorative art (wall pieces, lighting, sculptures): Any finish works - choose based on desired aesthetic
Outdoor pieces: Only UV-resistant epoxy topcoat or marine-grade finishes - nothing else survives
Processing Your Epoxy: The Reality Check
Here's what nobody mentions in the glamorous pour videos: processing takes 3-5 times longer than the actual casting.
A river table I can pour in 2 hours might take 12-15 hours of processing - routing, sanding through grits, edge work, repairs, final finishing. This is normal. This is the craft.
If you rush processing, it shows. If you skip grits, it shows. If you apply finish over invisible scratches, they become very visible.
The good news: proper epoxy processing is entirely within your control. Unlike the variables in pouring (temperature, humidity, cure behavior), processing is pure technique and patience. Master these fundamentals, and you'll produce work that looks professional rather than homemade.
...to be continued in Beginner Epoxy Mistakes: Lessons I Learned the Hard Way
Petr
Resin Craft Guild
www.resincraftguild.com
P.S.
One of the most valuable tools for epoxy processing - often overlooked - is good lighting. Invest in a bright LED work light and inspect your surface from multiple angles before moving to the next step. You'll catch imperfections when they're easy to fix, not after you've applied final finish. It's as critical as having the right sander or sharp router bits.
Frequently Asked Questions About Epoxy Processing
How long should I wait before processing epoxy after demolding?
Follow your manufacturer's full cure time - typically 72 hours for thick pours, 24 hours for thin layers. Epoxy feels hard after 12 hours but isn't fully cured. Process too early and it will gum up sandpaper and router bits, creating a sticky mess.
Can I use regular wood sandpaper on epoxy?
You can, but it clogs within minutes and stops cutting effectively. Epoxy-specific or automotive sandpaper lasts 5-10 times longer and works far better. The cost difference is minimal compared to wasted time fighting clogged paper.
What grit should I stop at for a natural oil finish?
Stop at 320-400 grit for most hard wax oils like Rubio Monocoat or OSMO. Some manufacturers recommend staying at 220-320 grit for optimal oil penetration into wood grain. Always test on scrap first.
How do I fix scratches I missed from previous grits?
You have to go back to the grit level that caused those scratches (or one below) and work forward again through the progression. There's no shortcut - you can't sand out 120-grit scratches with 400-grit paper.
Should I wet sand epoxy?
Wet sanding is essential for grits above 800 when going for high-gloss finish. Water lubricates, reduces heat, and prevents dust. For grits below 800, dry sanding with good dust extraction works better.
Why does my epoxy turn cloudy or yellow when sanding?
Overheating from friction. You're sanding too aggressively in one spot or your sandpaper is clogged. Keep the sander moving, use light pressure, and change sandpaper frequently. Cloudy spots from overheating are usually permanent.
Expand your resin finishing skills with these guides: