Hey fellow crafters,
First - a quick welcome to everyone who joined the Guild this month. We've grown by 10% in February alone, which is incredible. If you're new here, glad to have you.
Early in my crafting journey, I got my hands on a penetrating epoxy I wanted to test out. Sounded special. Didn't bother checking the maximum mixing volume - mixed about double what the formula allowed. What happened next was my first real encounter with an exothermic reaction. The cup got hot. Then hotter. Then the resin started smoking. My whole workshop filled with fumes before I could even react.
Nobody got hurt. But that moment taught me something no tutorial had: epoxy resin has limits, and ignoring the specs doesn't just ruin your project - it can turn your workspace into a safety hazard.
Today's Lineup:
1. This Week's Insight:
Epoxy Resin Parameters That Make or Break Your Project
I faced a dilemma with this issue: share my experience with specific products and brands - the stuff most of you are waiting for - or take a step back and explain the parameters that actually define whether a resin works for your project. Well, you'll need to hang with me a little longer. Because once you understand what these numbers mean, picking the right brand becomes the easy part. That's next week. For now, here's the short version:
Key Takeaways
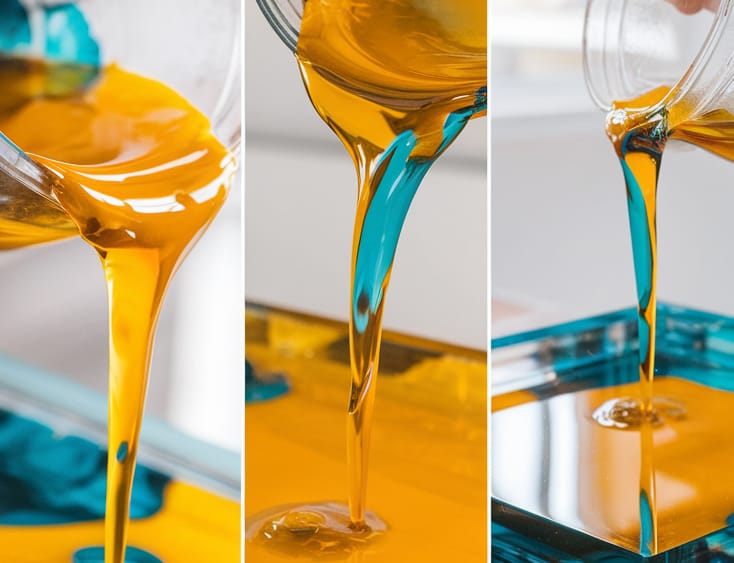
There are dozens of epoxy parameters on a spec sheet - viscosity, Shore D hardness, bonding strength, chemical resistance, temperature resistance. If you're deep into industrial applications, they all matter. But if you're a crafter starting out, four numbers will save you from 90% of the problems I've seen (and caused):
Pot life - the time you have to work before the resin starts hardening. Fast formulas give you as little as 5 minutes. Slow-cure can stretch to 8 hours. If you're positioning inlays, doing layered pours, or mixing pigments, you need that longer window.
Maximum casting thickness - every epoxy has a limit per pour, typically 1-10 cm depending on the formula. Exceed it and the exothermic reaction builds up faster than the heat can escape. Result: bubbles, cracks, warping - or what happened in my workshop with the smoke. This is not a guideline. It's a hard limit.
Maximum mixing volume - closely related to casting thickness but often overlooked separately. Mix too much at once and the same heat problem kicks in, except now it starts in the cup before the resin even reaches your mold. The spec sheet tells you the safe volume. Respect it, or pour in batches.
UV stability - standard epoxy yellows over time, especially near windows or outdoors. If your piece will see any daylight, you need a UV-stabilized formula or a UV-resistant topcoat. No exceptions. I use almost exclusively UV-resistant resins at this point - the price difference compared to standard formulas isn't that high, and it's not worth gambling on a piece yellowing after a few months.
My take: I used to pick epoxy by price and availability. That worked until it didn't. Now I check these four specs before I buy anything. Takes 30 seconds on the data sheet. The rest of the parameters matter too - but these are where beginners lose money and materials first.
Continue reading: Key Parameters of Epoxy Resin Explained
2. Project Inspiration:
From Sketch to Workshop - How Ideas Actually Develop
I recently dug out an old design sketchbook I hadn't opened in a while. And honestly, flipping through it was a trip.
When I get a project idea - or see something that sparks one - I sketch it. Nothing fancy. Just enough to get the shape, the proportions, the general concept down on paper. Then I iterate - drawing variants, shifting proportions, adding or stripping details until it feels right.
Here are two examples - the original sketch next to the real thing.


It's interesting to see how far an idea can travel from that first pencil line. Some projects stay close to the original vision. Others take a completely different turn once the material has a say.
Designer's perspective: sketching before cutting isn't about being artistic - it's about making mistakes on paper instead of on expensive material. A 5-minute sketch can save you from committing to proportions that don't work or joints that don't make sense once the piece is in front of you.
Now I'm curious - what does your design process look like? Do you sketch first, plan digitally, or just go straight to the workshop and figure it out as you go? Hit reply - I'd love to hear how you approach it.
3. Materials & Tools Spotlight:
Workshop Dust Extraction
I've been completing a dust extraction system in my workshop this week. The remote control still needs to be done, but I consider that an upgrade for later.

If you're working with epoxy - especially sanding it - efficient dust extraction together with a face mask filter is not optional. Epoxy dust is fine and sticky, especially when you're sanding higher grits for a glossy finish - not something you want in your lungs.
Before this setup, I was using a shop vac connected to a cyclone separator. It works. If you're on a budget or in a smaller space, that's a solid starting point. You can also go with ready-made brand solutions that come as complete systems - less DIY, more plug-and-play, but at a higher price.
The difference between the two? The shop vac + cyclone handles single-tool extraction well. A dedicated system lets you run ducting to multiple stations and switch between them. Once you're sanding, routing, and cutting regularly, that convenience adds up fast.
Bottom line: Start with a shop vac and cyclone if you're just getting into epoxy work. Upgrade to a full system when you find yourself disconnecting and reconnecting hoses more than you're actually making things.
4. Quick Win of the Week
This one comes straight from the Guild. Claudine asked:
When I use glitter with resin, it sinks to the bottom and the top half stays transparent. I had to add the colour of the glitter to fix it. What can I do if I want transparency?
Glitter sinks - that's just physics, it's heavier than the resin. Four ways around it:
Thicken first. Use a fast-curing resin and let it start to thicken before adding glitter. Slower settling.
Layer it. Pour in thin stages, sprinkling glitter between each layer.
Stir through the cure. Pour, then gently stir with a needle over time until the resin reaches the gel phase.
Go UV. For small objects - which I'm guessing is Claudine's case - UV-curing resin (3-5 minute cure) barely gives glitter time to move. That would be my pick.
Got a question? Reply to this email - yours might end up here next.
5. Shape the Guild:
Today we went deeper into the specs behind the resin - the numbers most of us skip before buying. Now that you know what to look for.
Next week gets practical: an honest look at epoxy brands.
Until then - check those spec sheets.
Your feedback is invaluable - vote in the quick poll below, or hit reply with your opinion or questions directly.
Which epoxy parameter was a new learning for you?
Growing together - partnerships open.
The Guild is growing fast - over 1,000 of you now, with around 300 new makers joining every month. That kind of growth opens doors. We're looking to establish partnerships our readers have a real benefit from:
Epoxy resin manufacturers
Woodworking tool brands
Sanding and finishing companies
Craft education platforms
No banner ads, no generic promos. We only work with brands we can integrate honestly into the content you already read. If that sounds like a fit, share our partnerships page or have them reach out at [email protected].
Strong partners mean stronger content - that's how the Guild works.
Petr from Resin Craft Guild
www.resincraftguild.com