Hey fellow crafters,
How's the time been since the last issue? On my side it's been a busy stretch. I got my old Shapeoko 2 CNC installed and running again in the new workshop, fought a planer that ruined an end-grain board glue-up, added a Laguna drum sander to the tooling lineup, and worked through testing of several EU resin brands - more on that in a future issue.
As I felt there has been all too much about malachite lately, I decided to give it a break.
Recently I've done several boards with routed resin inlays, and on today's piece I want to walk through the process with you.
Here's the thing: most routed inlay failures aren't about the resin at all. They happen in the prep. The pour is the easy part.
Today's Lineup:

1. This Week's Insight: Routed Resin Inlays
Most routed inlay problems don't happen during the pour - they happen during the prep that comes before it. Wood choice, base flatness, the surface seal, how you handle the channel. Small decisions that feel minor until you're sanding back a finished piece and the colour bleeds past the edge

Key Takeaways
Choose hardwoods with tight grain. Maple, walnut, oak - they resist epoxy bleeding into the surrounding wood. Keep moisture content below 12%.
V-bits do the channel work. 60-degree most of the time, 30-degree for finer lines. The V profile gives clean edges and the channel depth follows the bit angle - one pass, consistent depth, no second cleanup cut.
Seal the whole board surface before you pour. A very thin transparent resin pour across the entire top closes the grain everywhere at once. Doing the whole surface keeps the seal uniform, so when the pigmented resin goes in, it can't wick out into the surrounding fibres anywhere.
Clean the channel before you pour. Dust and chips out of the groove - nothing fancier than that.
Build a boundary if the design needs one. For most channel inlays you don't need a dam - the channel walls hold the resin. When I do need a boundary (free-form pours, edge work, anything where resin would run), I use silicone from a tube to lay it down. Peels off clean after cure.
Pour over and sand down . I overfill the channel slightly, let it cure, then sand the overflow flush with the surrounding wood. The sander brings everything to one plane .
My take:
The full-surface seal is the step most readers skip, and it's the one that ruins the look of an otherwise clean inlay. Without it, pigmented resin wicks into open grain near channels and you get a ghost halo of colour that no amount of sanding fixes. A thin transparent pour across the whole top first, then the channel fill - boundary stays crisp everywhere.
📖 Continue reading: Breathtaking Wood & Epoxy Home Decor Ideas - Made Easy with a CNC Machine
2. Project Inspiration:
The Levitation (Tensegrity) Table
This one gets a lot of questions whenever I post it - a tensegrity coffee table that started as my own design and eventually found a home with a buyer in the US, with the bottom board carrying a routed resin inlay (a black tree and raven motif) and the floating top finished in epoxy. The kind of piece where people ask 'how is the top even staying up?' before they notice the inlay underneath, and then ask about both.

The structure is the trick: tensegrity relies on tension wires holding a suspended top above a base, with no rigid vertical connection. The top genuinely floats. What makes this version interesting is that the inlay work had to be done before assembly - once the cables are tensioned, you can't clamp or rout anything.
That sequencing constraint shapes every decision. The inlays needed to be fully cured, sanded, and finished before the table went together. No going back to fix an edge chip after assembly.
Top material | Solid oak hardwood (flattened from rough boards) |
Inlay design | Black tree and raven motif on the bottom board, V-bit routed and filled with pigmented epoxy |
Finish | Osmo Top Oil (food-contact certified) |
Cable hardware | 4mm stainless steel wired rope (~1 ton load limit), 3 central tension points + 4 corner counter-tension links, steel wire connectors from fence construction |
Dimensions | 40 × 55 cm |
Designer's perspective: The inlay does something specific in this piece - it sits on the bottom board where it catches the eye from underneath, which is exactly where the tension drama lives. A plain table and the floating structure alone reads as an engineering exercise. Add the inlay and it becomes a furniture piece. The two things amplify each other. For placement: this table needs a room where you can walk around it. Against a wall, you lose half the structure.
(For the curious: long-term load 20kg, short-term tested to 75kg.)
📖 Continue reading: Unleash Your Creativity - Build a Levitating Coffee Table
3. Materials & Tools Spotlight:
Laguna 16-32 Drum Sander
As I mentioned in the intro, this one landed in my workshop last week. I'd had this exact model picked out for a long time, but honestly it's not a cheap tool. I got lucky on a local price promotion and couldn't resist.

Up to that point I'd been sanding routed inlays flush with a random orbital sander like everyone else. It works - until you have a larger panel, or an inlay that's slightly uneven across its length, and then you spend an hour trying to level something a drum sander would handle in two passes.
The Laguna 16-32 is a bench-top drum sander - 16 inches wide with a 32-inch capacity when you use both passes. It's a machine that earns its place when you're doing any work that needs a consistently flat surface across a wide panel: inlays, glue-ups, anything where hand sanding introduces inconsistency.
What makes it different from a cheaper drum sander is the variable speed conveyor feed and the sandpaper drum tension system. Papers load and tension evenly, which means the drum actually contacts the surface consistently across its width. Cheaper machines have drum sag or uneven tension that leaves you with a slightly convex or concave pass - which defeats the point.
Bottom line: If you're doing occasional small projects, an orbital sander and patience gets you there. If you're working on larger panels or doing inlay work regularly, the drum sander removes a frustrating variable. The Laguna 16-32 is well-built for a benchtop machine - I wouldn't replace it.
4. What I'm Making for One of You This Month
One of my handcrafted pieces goes to a Gold Guild Patron every month, drawn in the first week. The June piece is on the bench right now: an end-grain oak serving board with a Resin Craft Guild badge inlay, routed and resin-filled.
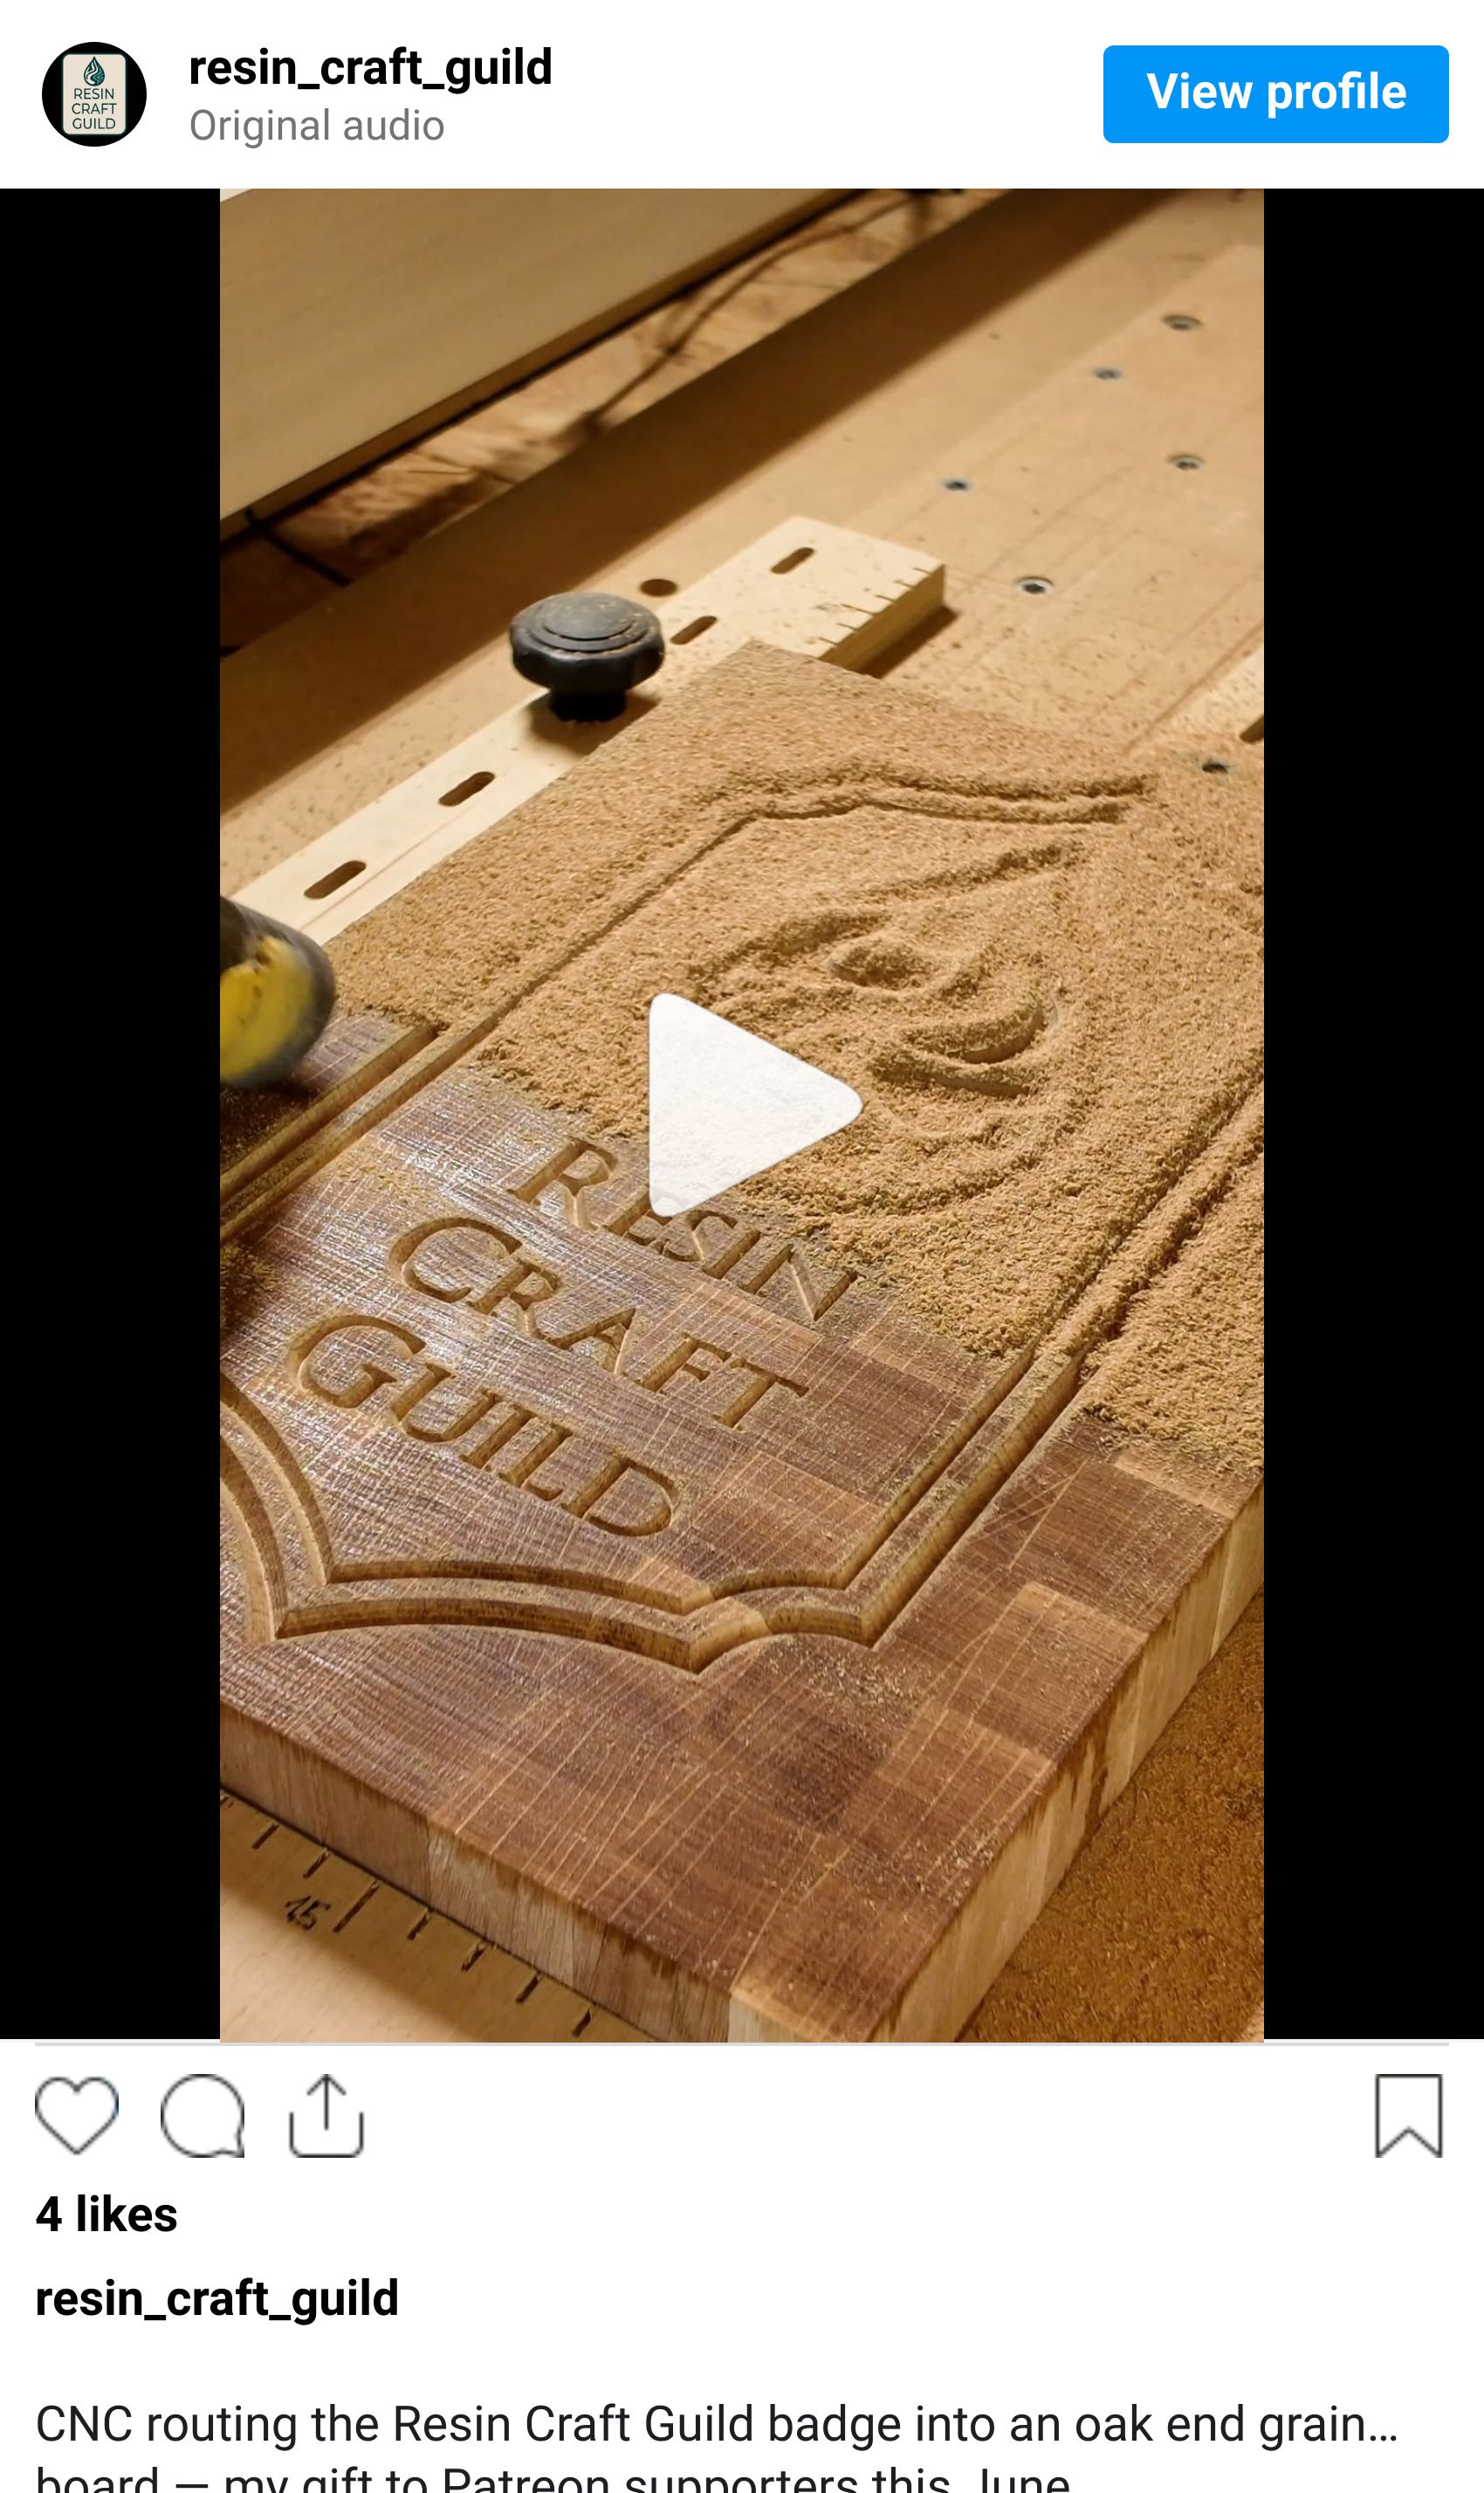
The casting is done in blue and gold. Still ahead this week: final sanding, then a surface finish of raw beeswax from our own hives.
My vision is to keep the Resin Craft Guild newsletter free, honest, and independent - for as long as there are makers who find it useful. If what I share here is valuable to you and you want to support the effort, I'd be glad to welcome you as a Guild Patron.
PS: And here's the honest part: I launched the Patreon last week, so there are no Gold Patrons in the draw yet. For the first few who join, the odds of your name coming out of the hat are about as good as they'll ever be - this board could be heading your way.
5. Save with the Guild
A couple of deals from partners where you can save on colorants and materials for your next pour.
Artline Resin - Tools, supplies, and colorants for resin and woodworking projects. Worth checking their colorant range alongside the other options here. Click the link or use code ResinCraftGuild for 10% off your entire order.
Eye Candy Pigments - Mica powders, pigment pastes, colorshift and specialty pigments for resin work. One of the most respected colorant brands in the maker community - wide color range, ships worldwide, and they offer sample sets so you can test colors before committing to full sizes. Click the link or use code resincraftguild for 10% off your entire order.
Resiners - Resin, colorants, and casting supplies. Good range of liquid pigments and mica powders alongside their resin systems. Click the link or use code ResinCraftGuild15 for 15% off your entire order.
Affiliate disclosure: Some links are affiliate links. If you purchase through them, I may earn a small commission at no extra cost to you. I only recommend trusted products relevant to the topic.
6. Shape the Guild
This week we are close to 1,700 Guild members. Thank you for your support - I'll do my best to keep it worth your time.
I've shared several new videos on Instagram and my YouTube channel last week.
Including this one - a board glue-up that didn't go as planned:
If you want more on my projects and behind the scenes, you should subscribe - it'll help the channel grow too 🤞
Every issue I try to cover what matters most to you. So let me ask directly:
What's your biggest resin challenge right now?
Reply with your answer, or just hit the poll - it shapes what I cover next.
Next week: we're back in the workshop with the malachite vein panel project. If you've been watching that one develop
Petr
Resin Craft Guild
www.resincraftguild.com
P.S. The CNC article linked above covers inlay design ideas that translate directly to hand-routing too - worth a read if you're figuring out what to put in the groove before you pick up the router.